
How do I light a plancha BBQ?
You light a plancha BBQ by first building an airy little tower of kindling around natural firelighter cubes, lighting that, and only adding larger pieces of wood once the fire catches well. Let the fire burn until you have a solid glow and the smoke has largely cleared, then give the cooking ring 20 to 30 minutes to heat up evenly.
- Build an airy little tower first, don't pack it tight, fire loves air
- Only add bigger wood once the kindling is burning well
- Wait for a solid coal base before heating the cooking ring
- The cooking ring needs 20 to 30 minutes to heat evenly
- Never use petrol or spirits as a firelighter
Lighting a plancha BBQ is simple, as long as you build the fire calmly. No hassle with chemical products, no smoke show, just a stable heat you can cook cleanly on later. With this step-by-step plan you'll get it right quickly. Want to also create heat zones afterwards or find out how to maintain your plancha? Check those guides too.
What do you need?
- Dry firewood (preferably beech, oak or birch)
- Kindling (thin, small pieces)
- Natural firelighter cubes
- Matches or a lighter
- Optionally a poker to spread the fire later
Use no petrol, spirits or other quick fixes. That's not tough, that's mainly a quick route to nasty flavours and unnecessary risk.
How to light a plancha BBQ: step by step
Step 1: Keep the base airy
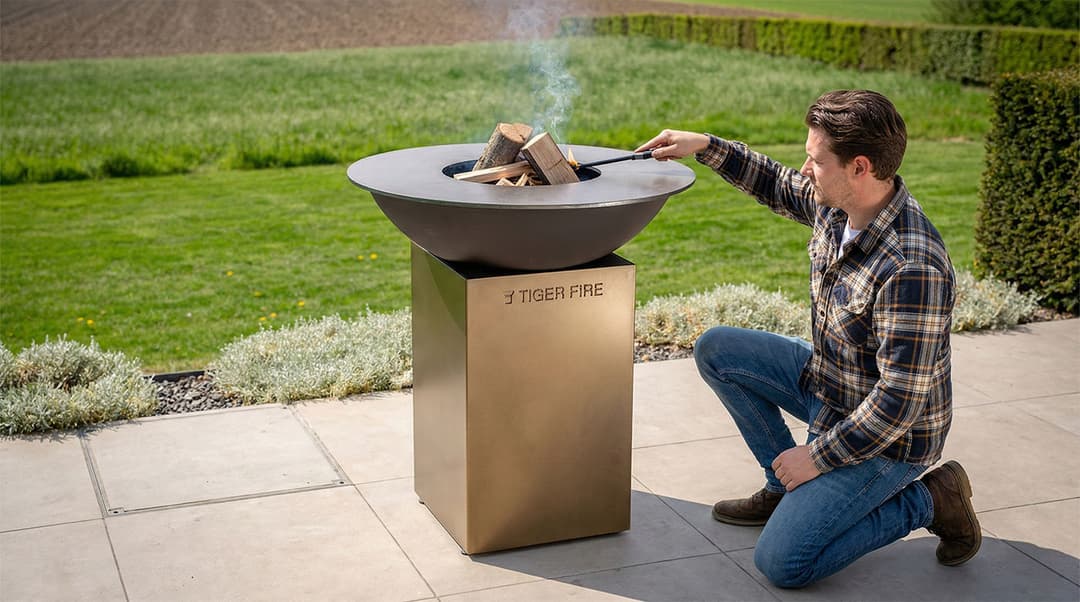
Place one or two natural firelighter cubes in the middle of your fire bowl. Build a small tower of kindling around it. Most important rule: don't pack it tight. Fire loves air.
Step 2: Light it and let it happen
Light the firelighter cubes and give the fire a moment to catch through the kindling. Don't immediately start poking, prodding or blowing. If you start fiddling at this point, you often just make it harder for yourself.
Step 3: Add bigger wood in stages
Once the kindling is burning well, add bigger pieces of wood. Place them against the flames so they can catch gently. Don't dump half a stack on at once. You want control, not a campfire contest.
Step 4: Wait for a stable coal base
The best plancha heat doesn't come from high flames, but from a good base of glowing coals. So let the fire burn until you have a solid glow and the smoke is almost gone.
Step 5: Let the cooking ring come up to temperature
The cooking ring needs time to heat evenly. Allow roughly 20 to 30 minutes, depending on your wood, weather and plancha. Once the ring warms up evenly, you can start using zones: hotter near the fire, calmer towards the outer edge.
When can you start cooking?
You can start once the heat is stable and the smoke has mostly cleared. In practice that means: there's a bed of glowing coals, the cooking ring feels hot, and your fire doesn't constantly need attention. Then you can put a bit of oil on the ring and start.
Common mistakes
- Adding too much wood at once, giving you lots of smoke and less control
- Using wet wood, so the fire catches poorly and your food tastes smoky and bitter faster
- Using treated or painted wood, which is unhealthy and ruins your flavour
- Using unnatural firelighters, which can give a chemical smell and off-taste
The solution is boring but effective: start small, scale up calmly, keep the wood dry and give the fire time.
Tips for temperature zones on your plancha
A plancha works best when you use multiple zones. Closer to the fire it's hotter for hard searing. Towards the outer edge it's calmer for cooking, keeping warm and delicate ingredients. Keep adding wood in small portions, so your heat stays predictable.